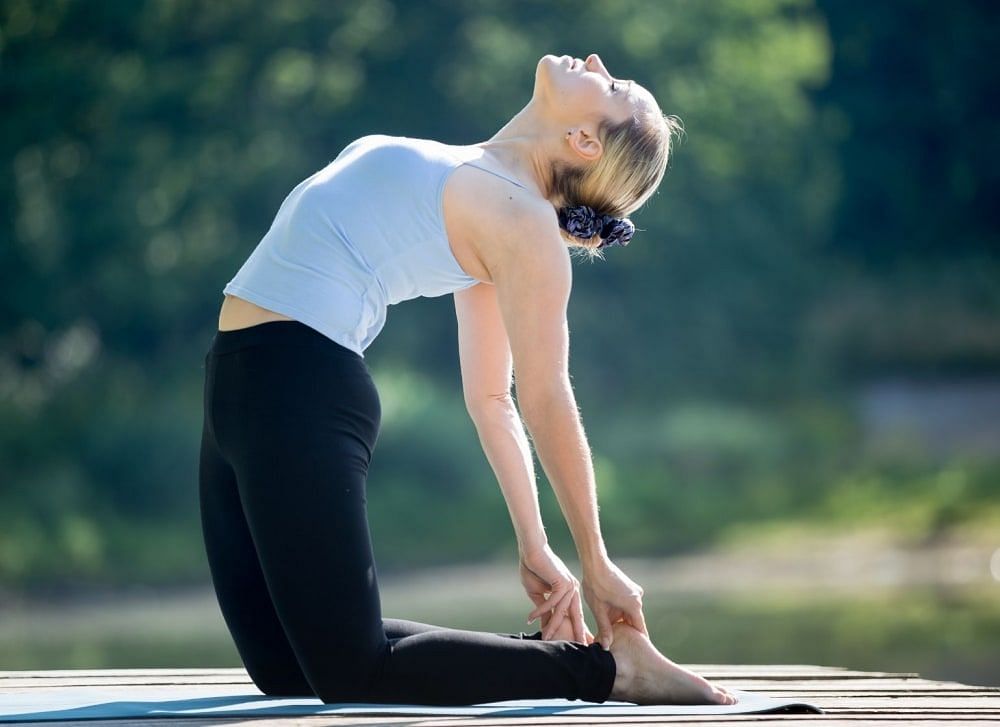

Gomukhasana is also known as the cow face pose; it is beneficial in more ways than one. It effectively maintains your body, can boost your mood, bring in more positivity and improve your physical and mental well being. This article explores the benefits of Gomukhasana and how you can practice this pose.
What is Gomukhasana?
Yoga poses connect our body, mind and soul and bring positivity and good health to our life. One such powerful yoga pose is Gomukhasana. It is even mentioned in Hatha Yoga Pradipika, a seminal textbook on Yoga.
Gomukhasana is a Sanskrit term that translates as Cow Face Pose in English. During this posture, our crossed legs look like the face of a cow. The knees look like the mouth, the shin looks like the side of a cow's face, and the feet look like the ears of a cow.
The Gomukhasana benefits us by improving our posture. It stretches arms, shoulders, chest, armpits, and hips and enables a wide range of shoulder movements. It improves flexibility and stimulates our body's chakras (svadisthana/spleen, sacral chakra, and the Anahata/heart chakra).
Sitting in the pose for a few minutes and concentrating on the breaths relieves stress and anxiety.
Gomukhasana Benefits
There are several health benefits of Gomukhasana:
- Treats sciatica
- Treats high blood pressure
- Enhances sexual performance
- Cures stiff and frozen shoulders
- Elongates spine and improves bad posture
- Reduces anxiety and stress
- Stimulates kidneys
- Strengthens the muscles of the back, hips, ankles, shoulders, thighs, inner armpits, triceps, and chest
Gomukhasana Steps - (How to Do Gomukhasana)
The steps to do Gomukhasana are:
1) Sit with your back straight on a yoga mat. Keep your legs extended.
2) Keep both the feet together and place your palms on the hips.
3) Now fold your left leg and gently place it under the right buttock.
4) Bring your right leg over your left thigh.
5) Stack both the knees closely over one another.
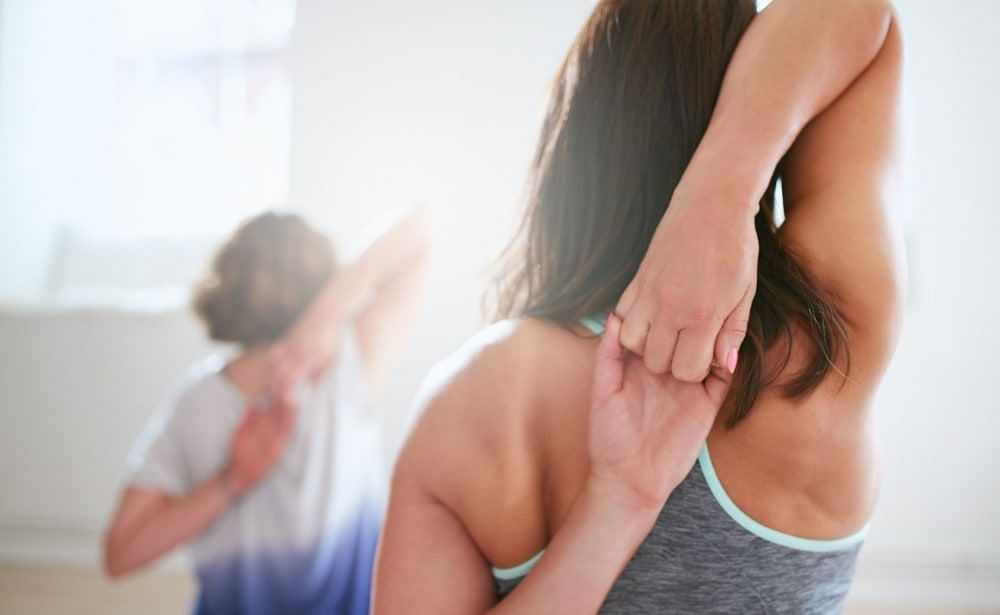
6) Now raise your left arm and bring it to the back over the shoulder. Keep the arm upwards, bend the elbow and palm facing outwards.
7) Stretch your right hand to the right, behind the back. Now, bend the elbow to reach the left hand. Try to grasp both hands with fingers interlocking behind the back.
8) Keep your spine straight and your head facing forward.
9) Stay in this pose for a few minutes (preferably under 60 seconds for beginners, not more than 120 seconds for the intermediate level, and 120 seconds and more for experts). But stay as long as you are comfortable.
10) Release your breath as you relax your hands and legs.
11) Repeat the same steps using opposite legs and hands.
12) After the pose, sit in a comfortable cross-legged posture.
Yoga Pose Breakdown
Here are a few tips to practice Gomukhansana for beginners:
- At first, you might not be able to hold both hands together. With practice and patience, you will gradually get better at it.
- You can use a strap and hold it with both hands behind your back. Try closing the gap between the two hands.
- Do not apply too much strain on your hands.
Modifications and Variations of Gomukhasana
There are few variations or modifications in the gomukhasana procedure which you can try to reap maximum benefits.
- Keep your knees separated if they are stiff and you cannot stack them on each other.
- If you have tight hips it can be difficult to balance in the pose. You can use a blanket for proper elevation to the side that is off the ground.
- If it's too intense in your legs, you can also practice this with one leg straight out in front, and the other folded over top with your heel towards your opposite hip.
- For an advanced level of Gomukhasana pose, you can fold forward and bring your chest down to your thighs. It will deeply stretch your hips, triceps and shoulders.
Precautions for Gomukhasana
- It is best to practice it in the morning. Make sure there's a 10 to 12 hours gap between your last night's meal and yogasana practice.
- Do not overstrain your body.
- Stay in the position for only as long as you are comfortable.
- Practise under the guidance of an expert first.
- If you experience pain in the shoulder, neck, back, consult a doctor before doing any asana.
Contraindications for Gomukhasana
If you have the following conditions, refrain from doing Gomukhasana:
- Shoulder injury
- Severe pain in thighs, hip, knee, shoulder, hands and legs
- Injury to muscle, ligaments and tendons of legs
- Sprain the legs
- Piles
- Serious neck injury
- Spondylitis
- Knee injury
- Varicose veins
- Hip replacement surgery
- Frozen shoulder
- Severe sciatica pain
If you practise Gomukhasana in the conditions mentioned above, it can aggravate the problem.
Other Poses Related to Gomukhasana
Before practising Gomukhasana, you should begin with
- Surya Namaskar (Sun Salutation)
- Baddha Konasana (Bound Angle Pose)
- Virasana (Hero's Pose)
- Garudasana (Eagle Pose)
- Dhanurasana (Bow Pose)
These asanas will open up your thighs, knees, chest, legs and shoulder. It will make Gomukhasana easier for you.
After the Gomukhasana, you should do
- Paschimottanasana (Seated Forward Fold Pose)
- Pincha Mayurasana (Peacock Feather Pose)
- Ardha Matsyendrasana (Half Lord of the Fish Pose)
- Adho Mukha Vrksasana(Downward-Facing Tree Pose)
- Padmasana (Lotus Pose)
Summing Up On Gomukhasana Benefits
To end with, practising gomukhasana helps treat high blood pressure, enhances sexual performance, cures stiff and frozen shoulders, elongates the spine and improves bad posture, reduces anxiety and stress, and stimulates kidneys. Also note that practitioners experiencing hip-related problems should refrain from performing this pose.
FAQs
Is Gomukhasana A Hip Opener?
Yes, gomukhasana is excellent for clearing your hip joints and helps in opening up your hips. Stress usually gets accumulated in the hips, and the hips act as a storage point for fear, anxiety, etc. Hence, practising the cow pose releases collected stress makes you feel positive and energised. Overall, it improves your mental well being while giving your body a good stretch.
Who Cannot Do Gomukhasana?
Individuals who have experienced any hip-related problems should refrain from practising this pose. If you have any injuries on your hamstrings, quadriceps, neck, shoulders or knees, or have existing pain in the back, shoulder or knees, then avoid practising gomukhasana. Moreover, it is not safe to practise this pose during pregnancy. And a professional teacher’s supervision is essential if you have stiff shoulders. Lastly, people who have sciatica must avoid doing the cow pose. Consult a doctor before practising this pose if you have any existing health problems.
What Should Be The Preparatory Poses Of Gomukhasana?
It is essential to start with Surya Namaskar, also known as sun salutation (at least ten rounds), practising the Baddha Konasana (Bound Angle Pose). These exercises help open thighs, shoulders, and knees, making it easier to perform gomukhasana. End with dhanurasana, which will ease up the chest, legs and shoulders.
It is advised to perform gomukhasana in the morning and have your meals 10 to 12 hours before performing the cow pose. This will benefit you in multiple ways and help maintain a healthy body. Finally, avoid straining the body beyond the limits as it may cause some serious injury.